
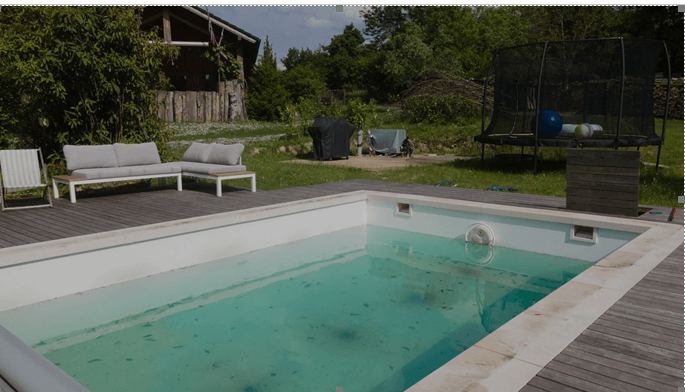
As the days grow longer and the sun heats the air, many of us begin to look forward to that first refreshing swim of the season. Opening your swimming pool is an exciting rite of passage for summer, but it’s also a critical task that sets the tone for crystal-clear water and hassle-free enjoyment. A proper pool opening isn’t just about pulling off the cover; it’s a systematic process of cleaning, checking, and balancing that ensures your backyard oasis is safe, healthy, and ready for countless hours of fun. Think of it as preparing your pool for its grand performance – every step counts.
The Great Reveal: Removing the Pool Cover
The first significant step in pool opening is carefully removing the winter cover. This can be one of the messiest parts of the process, but a little patience here can prevent a lot of debris from entering your pristine pool water.
Before removing the cover, use a pump to clear off any accumulated water, leaves, and debris from the surface. A leaf blower can help with dry debris. Once the cover is mostly clean, gently remove it, ideally with assistance to avoid tearing and to prevent debris from falling into the pool. Fold the cover and clean it thoroughly with a mild detergent and water, then allow it to dry completely before storing it in a cool, dry place. Proper cover maintenance prolongs its life and makes next year’s closing easier. This initial “clean-up” hints at the ongoing work your pool cleaner will undertake throughout the season.
Initial Clean-up: Tackling What Winter Left Behind
Even with the most meticulous winterization, some debris will inevitably find its way into your pool. This is the stage for a thorough physical cleaning.


- Skim and Brush: Use a long-handled net to skim out large leaves, sticks, and anything floating or submerged. Then, take a good pool brush and scrub down the walls, floor, and steps of your pool. This dislodges any remaining dirt, algae, or grime that has clung to the surfaces over the winter. Pay extra attention to areas where dirt tends to accumulate, like corners and behind ladders.
- Initial Vacuuming: For heavier debris at the bottom, a manual vacuum is usually the best initial approach. Connect your vacuum head to a pole and hose, then to your skimmer or dedicated vacuum port, and slowly vacuum the pool floor. This step is crucial for removing larger sediment before you start circulating the water.
This manual effort sets the stage for your automated helpers. While the initial clean-up is hands-on, it underscores the importance of continuous maintenance, which is where a reliable pool cleaner truly shines.
Reconnecting and Checking Equipment: The Pool’s Lifeline
With the physical debris mostly cleared, it’s time to reconnect your pool’s vital organs. This involves inspecting and reattaching pumps, filters, heaters, and other essential components.
- Filter Reassembly: If you disassembled your filter for winter, reassemble it according to the manufacturer’s instructions. Ensure all drains are closed and plugs are back in place.
- Pump and Heater: Reconnect your pump and heater to the plumbing. Check for any cracks or damage that might have occurred during winter. Lubricate O-rings if necessary.
- Skimmer Baskets and Return Jets: Install skimmer baskets and ensure all return jets are open and facing the correct direction to promote good circulation.
- Power Up: Once everything is reconnected and checked for leaks, turn on your pump and filter system. Listen for unusual noises and visually inspect for leaks at all connections. Let the system operate for a minimum of 24-48 hours to circulate the water and start filtering out fine particles.
This equipment check is foundational. A well-functioning filtration system is the primary line of defense against murky water, complementing the work of any pool cleaner you might employ.
Chemical Balancing: The Science of Sparkling Water
This is arguably the most crucial step for water quality and swimmer safety. Your pool water chemistry will likely be out of whack after months of dormancy.
- Test Your Water: Use a reliable test kit or strips to measure pH, alkalinity, calcium hardness, and chlorine levels. It’s often helpful to take a water sample to a local pool supply store for a professional, more comprehensive analysis, especially after a long winter.
- Adjust pH First: Begin by setting the pH level to the optimal range of 7.4-7.6. A high pH can decrease chlorine’s effectiveness and cause scaling, whereas a low pH may result in corrosion and eye irritation. Use a pH decreaser (e.g., muriatic acid or dry acid) or increaser (e.g., soda ash) as needed.
- Alkalinity: Once pH is balanced, adjust total alkalinity to between 80-120 ppm.
Calcium Hardness: Aim for 200-400 ppm. Too low can cause corrosion; too high can lead to scaling.
- Shock Treatment: After balancing pH and alkalinity, “shock” your pool. This involves adding a high dose of chlorine to kill off any remaining bacteria, algae, and contaminants that have accumulated. Follow product instructions carefully. Run your filter continuously after shocking.
- Maintain Chlorine: Once the shock has done its work (and chlorine levels have dropped back into the safe range of 1-3 ppm), begin your regular chlorine maintenance routine.
Patience is key during chemical balancing. It often takes a few days of testing and adjusting to get everything just right.
The Modern Helper: Embracing the Robotic Pool Cleaner
After the initial opening process, you’ll want to maintain that sparkling clarity with minimal effort. This is where advanced technology shines. While you’ve manually vacuumed, fine dust and daily debris will constantly accumulate. This is precisely why many pool owners consider a robotic pool cleaner to be an indispensable tool for ongoing maintenance.
These autonomous devices are dropped into your pool and get to work, independently scrubbing and vacuuming the floor, walls, and sometimes even the waterline. They have their own filtration systems, reducing the load on your main pool filter, and they collect even the finest particles, often leaving your pool spotless.
Why a robotic cleaner is a game-changer:
- Time-Saving: They do the hard work for you, freeing up your time for swimming or other activities.
- Thorough Cleaning: Their programmed navigation ensures comprehensive coverage, often reaching spots you might miss with a manual vacuum.
- Energy Efficiency: Many models are designed to be energy-efficient, using less power than running your main pump for vacuuming.
- Enhanced Filtration: Their independent filters capture fine debris, improving overall water clarity.
If you’re asking, “What’s the best pool cleaner for consistent, low-effort maintenance throughout the season?” the answer for many is unequivocally a robotic model. They are a significant upgrade from traditional methods and truly enable you to enjoy your pool more.
Final Touches: Ladders, Diving Boards, and Fun
Once your water is perfectly clear and balanced, it’s time for the finishing touches. Reinstall ladders, handrails, diving boards, and any other pool accessories. Check all bolts and fasteners for tightness and safety. A quick final skim and brush, and your pool is officially ready for its grand opening splash!
Opening your pool properly might seem like a lot of work, but following these steps systematically ensures a healthy, beautiful swimming environment. With your pump running efficiently, your chemicals balanced, and a reliable pool cleaner on duty, you’re set for a season of effortless enjoyment in your backyard oasis. Happy swimming!


